Introduction
Today, encryption plays an important role in cybersecurity. It allows businesses to secure customers’ information, allows us to navigate the internet without the fear of anyone else eavesdropping, and allows remote employees to connect to the work network securely. However, even though encryption is crucial for protecting one’s data, not many average home users utilize encryption. Average home users should be encrypting their desktops, laptops, and mobile devices because encryption is the most useful technology for protecting one’s privacy. However, many people don’t know where to start; they are daunted by the technology. This blog will help you encrypt your drive using an open-source program called VeraCrypt.
What Is VeraCrypt?
VeraCrypt is an open-source tool used for on-the-fly encryption. On-the-fly encryption is also called transparent or real-time encryption. Once set up, the user doesn’t even need to think about it; encryption happens as files are written to the disk. VeraCrypt is the successor of TrueCrypt, a discontinued freeware tool for on-the-fly encryption. There are other on-the-fly encryption tools out there, such as BitLocker, but VeraCrypt is free and available on Windows, macOS, and Linux, whereas BitLocker is only available on Windows 10 Pro or Enterprise.
According to VeraCrypt’s website, its main features are:
- Creating a virtual encrypted disk within a file and mounting it as a real disk
- Encrypting an entire partition or storage device
- Encrypting a partition or drive where Windows is installed (pre-boot authentication)
- Automatic, real-time (on-the-fly) and transparent encryption
More information on features and limitations can be found in the documentation.
This blog will teach you how to encrypt your boot drive with pre-boot authentication. To download VeraCrypt, click here. See VeraCrypt’s documentation for information on setting up an encrypted container file that functions as a separate disk.
How to Encrypt Your Boot Drive
Step 1: Launch VeraCrypt and select Create Volume.
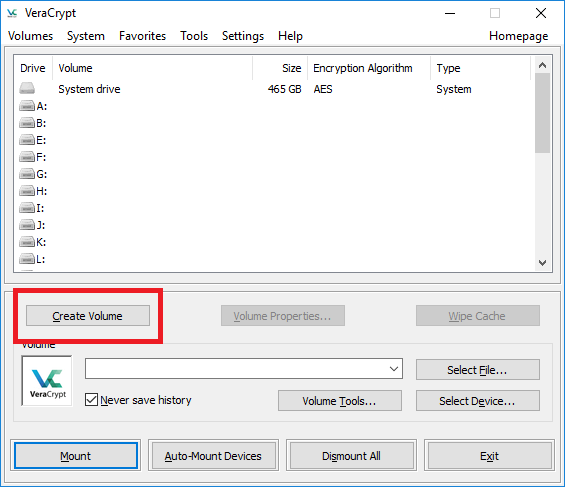
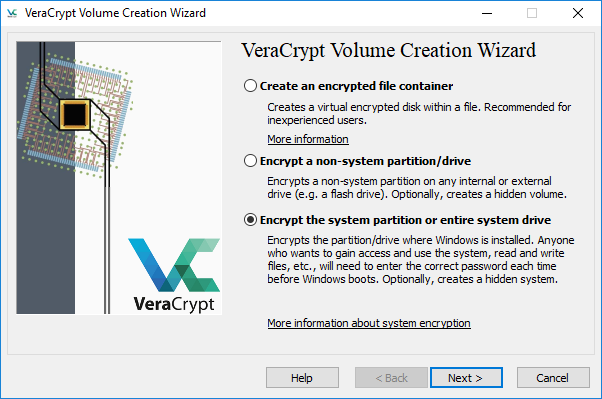
Step 2: Choose Encrypt the system partition or entire system drive and click Next.
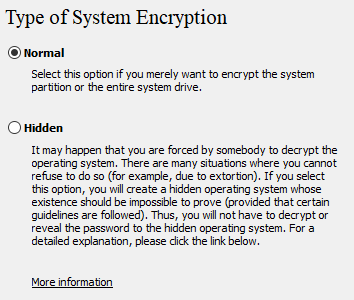
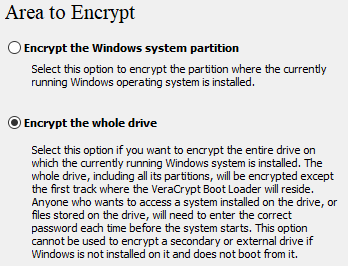
Step 3: Choose Normal for Type of System Encryption and Encrypt the whole drive for Area to Encrypt.
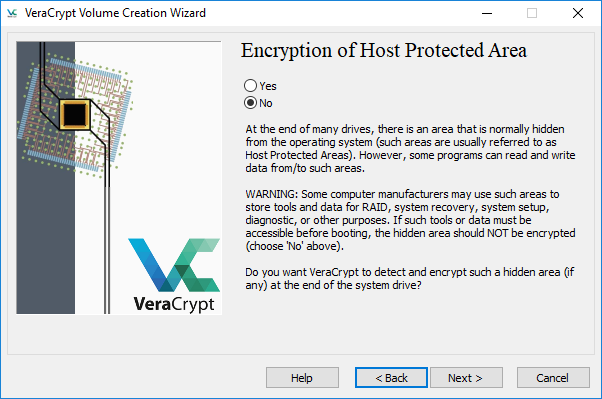
Step 4: If you are not sure if your computer needs to access the Host Protected Area before booting, choose No.
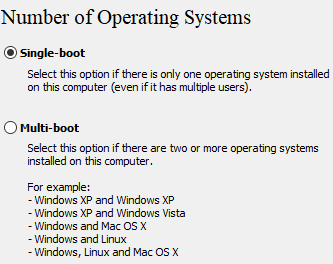
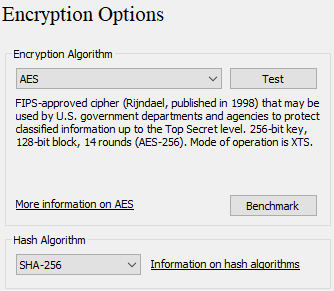
Step 5: Choose either Single-boot or Multi-boot and leave the default options in Encryption Options (AES and SHA-256).
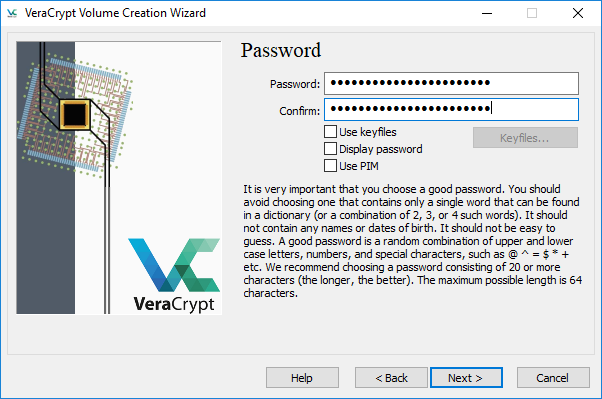
Step 6: Create a password and make sure to use a strong password! Also, store the password in a password manager such as LastPass or KeePassX, with the database stored in the cloud or on a separate drive. Check out our blog to learn how to manage passwords. You can also use keyfiles and PIM to harden your security; however, a good password (VeraCrypt recommends at least 20 characters) should be enough for now.
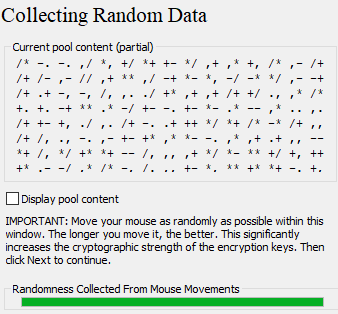
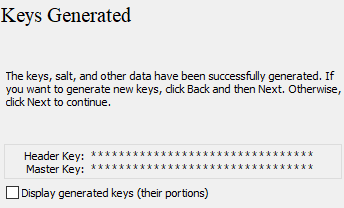
Step 7: Move your mouse to generate randomness that is going to be used to strengthen your encryption keys. Click Next and VeraCrypt will optionally show you the keys it generated.
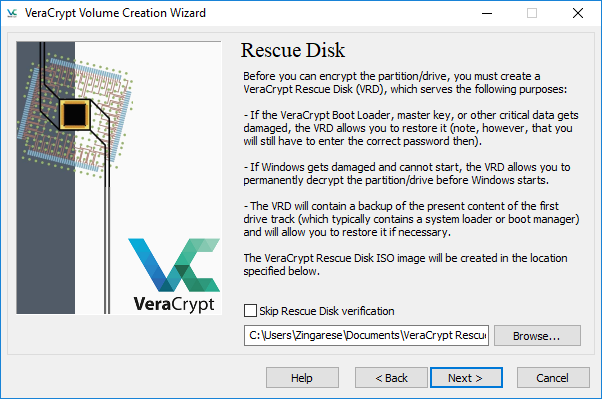
Step 8: VeraCrypt recommends that you create a VeraCrypt Rescue Disk (VRD), which can be used to:
- Restore VeraCrypt Boot Loader, master key, or other critical parts if they are damaged
- Permanently decrypt the partition/drive if Windows gets damaged and cannot start
- Restore your drive with a backup of the present content of the first drive track
Create a bootable CD-ROM with the ISO image provided before you continue.
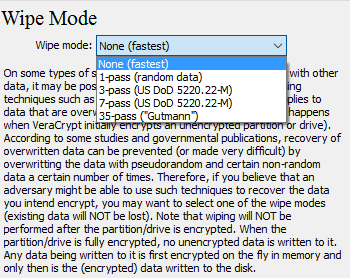
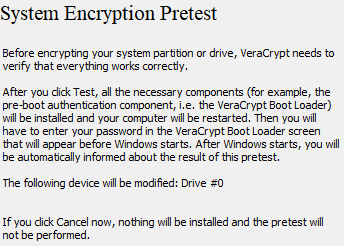
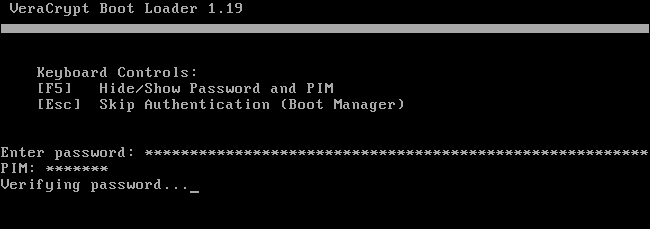
Step 9: Choose the wipe mode (1-pass, random data should be sufficient) to prevent others from recovering data from slack space or deleted files. Click Next and VeraCrypt will test to see if everything is working correctly. Click Test and the system will reboot. On reboot, you will be greeted by VeraCrypt and it will ask you to enter the password. If you didn’t use PIM, just hit Enter and it will start verifying your password. If it’s correct, your system will boot normally.
Step 10: After a successful reboot, you can now encrypt your drive. Depending on the size of your drive, it might take from an hour to several hours for the encryption to finish.
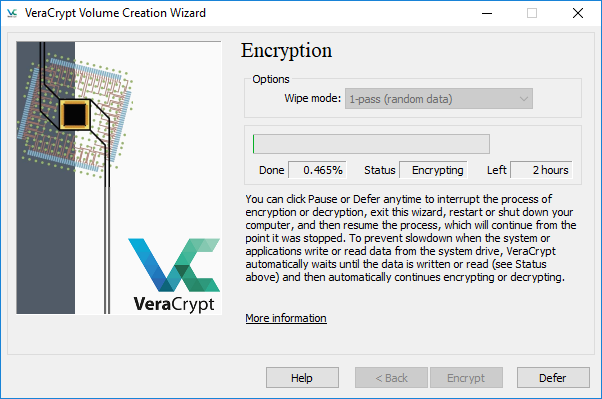
Voilà! Your whole system is encrypted and you can keep important files straight on your desktop or anywhere on your system drive.
Conclusion
Encryption is the most useful mechanism used to protect one’s privacy and VeraCrypt is a wonderful open-source program that works on Linux, macOS, and Windows. However, it doesn’t make your information bulletproof. Hackers are now moving away from hacking devices to hacking people (social engineering). Even if you use strong passwords, encrypt your drives, and run antivirus software, one successful social engineering attack can subvert your other defense mechanisms. Follow security best practices, and use defense-in-depth to protect your data and privacy.
To learn more about VeraCrypt, visit its page.
Author Bio

Joseph Choi is a Cybersecurity Analyst with Alpine Security. He holds several security-related certifications, including EC-Council Certified Security Analyst (ECSA), CyberSec First Responder (CFR), Security+, and Network+. Joseph is a recent graduate from Truman State University with a B.S. in Business Administration. Joseph’s cybersecurity experience began at Alpine and includes penetration tests, vulnerability assessments, and wireless penetration tests. He was born and raised in South Korea until the age of 10 when he moved to Mexico. It wasn’t until 2007 that his family moved to the States where he completed his high school and college education. He is a fan of Mr. Robot, and in his spare time he enjoys spending time with his girlfriend, taking long walks around the park, and going to the gym.

